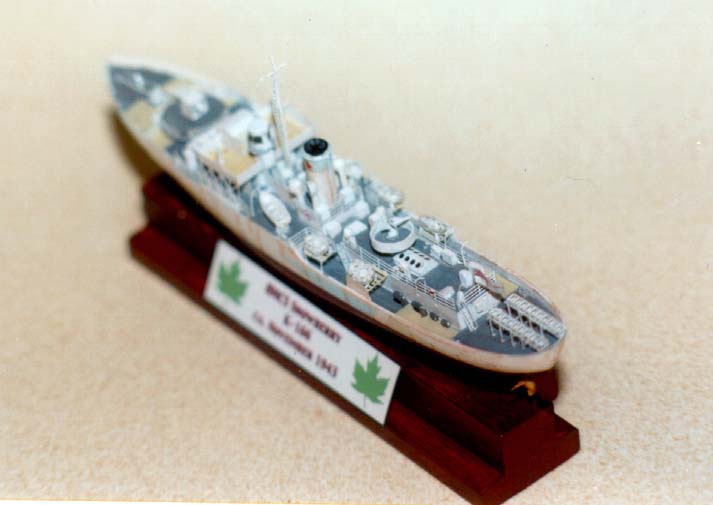
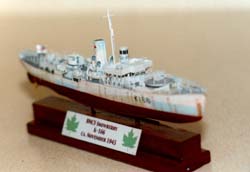
L'Arsenal 1/400 Flower Class Corvette
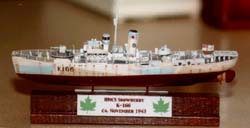
HMCS Snowberry K166
|
|
Introduction
So much has been written about the history of the Flower Class corvette,
that there is no need to go into it once again. Suffice it to say that
these important little ships hold a place in the hearts of many, myself
included. Within the past few months I have been fortunate enough to acquire
a half dozen of the L'Arsenal kits and I intend to do an infrequent series
of articles on converting them to the various 'typical' configurations
that they could be seen in during the Second World War. First off will
be an out of box build as the Royal Canadian Navy corvette HMCS Snowberry.
HMCS Snowberry
Built by Davie Shipbuilding Co. Ltd in Lauzon Quebec, Snowberry was
originally intended for the Royal Navy, and as such she is in typical
RN, rather than RCN fit. The main differences between RN and RCN Flowers
was in the location of the galley - originally right aft in RN ships,
later in front of the funnel and behind and below the bridge in RCN, and
the location of the 2pdr bandstand. The RCN moved it aft to open up the
arcs of fire. Canadian yards were building ten Flowers for the RN, however
upon arrival in the UK, the RCN was persuaded to man these ships themselves,
although the RN would pay for their upkeep. This led to the RN-owned,
but RCN-operated Flowers being kept abreast of the RN Flowers in new technology
and refits, while the RCN owned Flowers were generally a year behind their
RN counterparts.
 Commissioned
on 15 May 1941, Snowbery took part in many of the furious convoy battles
of the period and assisted in the sinking of U-536 north of the Azores
on 20 November 1943. As built Snowberry had a short foc's'le, no radar,
mast before the bridge and the galley right aft. A refit in the US port
of Charleston between 8 December 1941 – 14 February 1942 saw her
fo'c'sle lengthened and type 271 radar added. A second refit in May 1943
resulted in the appearance depicted here. Her bridge is in the final configuration
and the mast is behind the bridge. An excellent series of photographs
in the recent Warship
Perspective: Flower Class Corvettes (by John Lambert) show her leaving
Charleston harbour on 14 May 1943 at the conclusion of this refit. Commissioned
on 15 May 1941, Snowbery took part in many of the furious convoy battles
of the period and assisted in the sinking of U-536 north of the Azores
on 20 November 1943. As built Snowberry had a short foc's'le, no radar,
mast before the bridge and the galley right aft. A refit in the US port
of Charleston between 8 December 1941 – 14 February 1942 saw her
fo'c'sle lengthened and type 271 radar added. A second refit in May 1943
resulted in the appearance depicted here. Her bridge is in the final configuration
and the mast is behind the bridge. An excellent series of photographs
in the recent Warship
Perspective: Flower Class Corvettes (by John Lambert) show her leaving
Charleston harbour on 14 May 1943 at the conclusion of this refit.
Snowberry was returned to the RN in 1945, used as a gunnery target in
1946 and broken up in 1947.
The Model
 As
usual my main problem in building a kit was in determining just which
one to do it as. The L'Arsenal kit gives many options, but none of them
appealed to me at the time. As there was the great collection of photos
of Snowberry, I decided on her as she appeared circa November 1943, around
the time of the sinking of U536. As
usual my main problem in building a kit was in determining just which
one to do it as. The L'Arsenal kit gives many options, but none of them
appealed to me at the time. As there was the great collection of photos
of Snowberry, I decided on her as she appeared circa November 1943, around
the time of the sinking of U536.
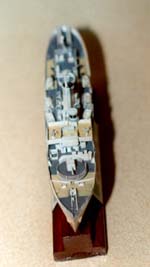
After cleaning up the hull – it was cast with a block below the
keel, I attached the hull to its display base. As I plan a series of these
ships, a simple base design was chosen. The base consists of a section
of pine in a 'T' section as used for a drawer runner. Two holes were drilled
into the base and the bottom of the hull, metal rod was then glued in
the base (using white glue), and the hull using CA. Construction could
now begin.
 I
sprayed all parts with Testors Flat White (in the little bottles). The
next day I sprayed both camouflage colours on the hull. Normally I do
one colour per day, but this time I tried something a little different.
First I masked the areas that were to remain white, then I covered the
section that were to be Western Approaches Green and sprayed the WA Blue
panels. For the blue I used the same mixture I had done up for my 1/700
WEM Buttercup, a dash of white added to Testors Sky Blue. I removed the
cover to the WA Green, gave the WA Blue a few minutes to dry and then
carefully covered them. The WA Green (mixture of Agama WW1 German Light
Green and Testors White) was then sprayed and all tape immediately removed.
The next day I masked the upper hull and sprayed the lower hull with a
mix of Ceramcoat red and black. Again the tape was immediately removed. I
sprayed all parts with Testors Flat White (in the little bottles). The
next day I sprayed both camouflage colours on the hull. Normally I do
one colour per day, but this time I tried something a little different.
First I masked the areas that were to remain white, then I covered the
section that were to be Western Approaches Green and sprayed the WA Blue
panels. For the blue I used the same mixture I had done up for my 1/700
WEM Buttercup, a dash of white added to Testors Sky Blue. I removed the
cover to the WA Green, gave the WA Blue a few minutes to dry and then
carefully covered them. The WA Green (mixture of Agama WW1 German Light
Green and Testors White) was then sprayed and all tape immediately removed.
The next day I masked the upper hull and sprayed the lower hull with a
mix of Ceramcoat red and black. Again the tape was immediately removed.
 One
more step remained before I could begin adding the details to the model,
the decks were painted in a combination of dark grey for the metal areas
and Humbrol 74 for the wooden cladding on foredeck and around the stern
depthcharge launchers. The bridge decks were also painted in Humbrol 74. One
more step remained before I could begin adding the details to the model,
the decks were painted in a combination of dark grey for the metal areas
and Humbrol 74 for the wooden cladding on foredeck and around the stern
depthcharge launchers. The bridge decks were also painted in Humbrol 74.
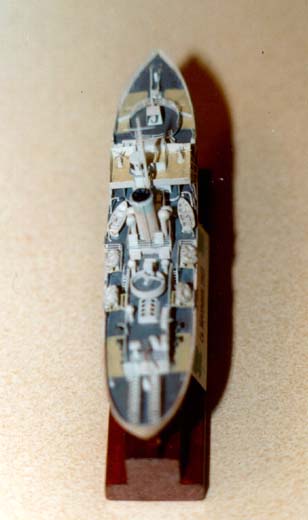
The bridge is interesting as although the basic structure of the wheelhouse
and Asdic hut are resin, it is almost all photo-etch. I began by adding
the black window decals to the wheelhouse. The open bridge was assembled
as per the instruction by folding the verticals upright and CAing them
in place. The exterior weather breaks were then added to the sides of
the wheelhouse and the bridge was test fitted in place. . . oops, the
protective uprights were too high to allow the bridge to sit on top of
the wheelhouse. Rather than cut them down I CAed a shim of sheet styrene
onto the wheelhouse and CAed the open bridge on top of this. The three
sides to the compass platform were then added as was the type 271 radar
shack. The final step was to add the lattice supports to the bridge wings.
I boo-booed and CAed these upside down – the thick side should be
up.
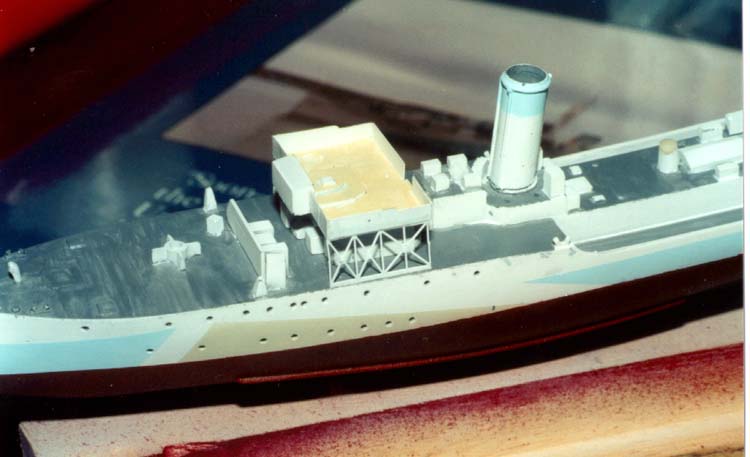
 Next
the skylights were added to the engine room casing. I painted the top
of the skylight black, leaving about 1.5mm around the edges white. The
PE skylight was then CAed in place over this. Other PE bits were placed
where required. These include the two Carley float platforms as well as
splinter shields on bow and amidships. The 4" platform was also added
at this time. Next
the skylights were added to the engine room casing. I painted the top
of the skylight black, leaving about 1.5mm around the edges white. The
PE skylight was then CAed in place over this. Other PE bits were placed
where required. These include the two Carley float platforms as well as
splinter shields on bow and amidships. The 4" platform was also added
at this time.
The next step was to add the PE rails. The kit comes with three-bar
rails with a separate foot for each stanchion, however I replaced these
with a set of three-bar rails from Tom's Modelworks (with a solid bottom
foot)... the real Flowers used two-bar rails, and Tom's Modelworks also
stock these – in fact I have since acquired some and plan to one
day replace those on this model with the correct two-bar pattern. Ladders
were also placed at this time.
 The
vents were CAed in place. Note that they do not need to be placed in any
one direction. Photos of Flowers show these at all angles, so feel free
to do so yourself. The 4" gun and the 2pdr were built and added to
their respective bandstands. The
vents were CAed in place. Note that they do not need to be placed in any
one direction. Photos of Flowers show these at all angles, so feel free
to do so yourself. The 4" gun and the 2pdr were built and added to
their respective bandstands.
The Carley floats had thin paper strips wrapped around them and they
were then CAed to their platforms. The two 16' dinghies were given thwarts
from leftover PE sections and CAed to the deck. I then placed their davits
over them. I made a mistake and used the depth charge davits for the boats,
which meant the lighter boat davits had to be placed aft for the depth
charge throwers. Depth charges and throwers were handpainted in a dark
olive green and CAed in place.
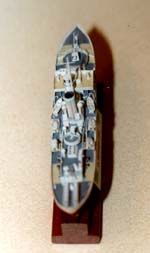 The
depth charge racks went together well and were CAed in place. They depict
a type seen on some Flowers, but most would be much lower and exit through
the stern rather than over it. I may correct this in the future (or not).
Final details were added and the fun part was now about to begin The
depth charge racks went together well and were CAed in place. They depict
a type seen on some Flowers, but most would be much lower and exit through
the stern rather than over it. I may correct this in the future (or not).
Final details were added and the fun part was now about to begin
Decals & Weathering
 I
looked through 25 years worth of decals and was unable to find any that
contained the required K166, however I did find a set with X 0-9, so I
made my own 'K' by cutting an 'X' in half and adding an 'I' to it. I dabbed
the spot where they were to go with Future and began piecing the various
component letters/numbers in place. When done I gave them another dab
of Future to seal them in place. Later RustAll Flat was applied over the
decals to get them back to the same shine as the hull. I
looked through 25 years worth of decals and was unable to find any that
contained the required K166, however I did find a set with X 0-9, so I
made my own 'K' by cutting an 'X' in half and adding an 'I' to it. I dabbed
the spot where they were to go with Future and began piecing the various
component letters/numbers in place. When done I gave them another dab
of Future to seal them in place. Later RustAll Flat was applied over the
decals to get them back to the same shine as the hull.
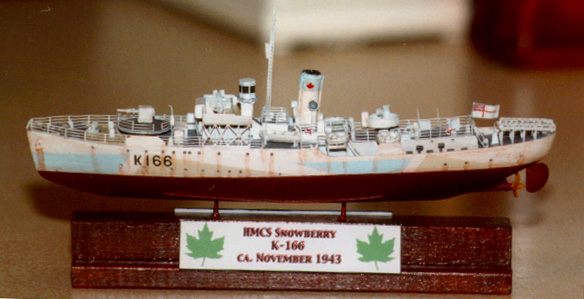
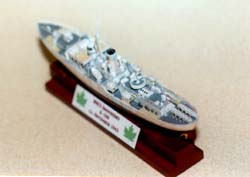
 The entire
model was now given a wash of RustAll Rust. Later streaks of the same
were applied and then a wash of the black stuff was applied. The model
was basically done, except I looked at some photos of Snowbery in November
1943 and she was wearing a maple leaf on her funnel. This wasn't there
in the May 1943 photos, but I had to add it. . which made the model now
in November, not May. Canadians in WW2 used a GREEN maple leaf, not the
more familiar RED one of modern times, however I only had red leafs on
hand and used two of those. The entire
model was now given a wash of RustAll Rust. Later streaks of the same
were applied and then a wash of the black stuff was applied. The model
was basically done, except I looked at some photos of Snowbery in November
1943 and she was wearing a maple leaf on her funnel. This wasn't there
in the May 1943 photos, but I had to add it. . which made the model now
in November, not May. Canadians in WW2 used a GREEN maple leaf, not the
more familiar RED one of modern times, however I only had red leafs on
hand and used two of those.
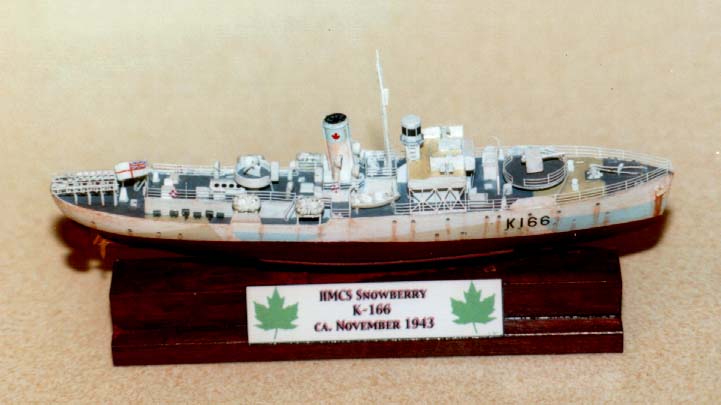
The base was then painted in Ceramcoat Burnt Umber and given multiple
coats of Future. A final touch was the nameplate. I did this on my printer
and added the requisite green maple leafs.
Conclusion
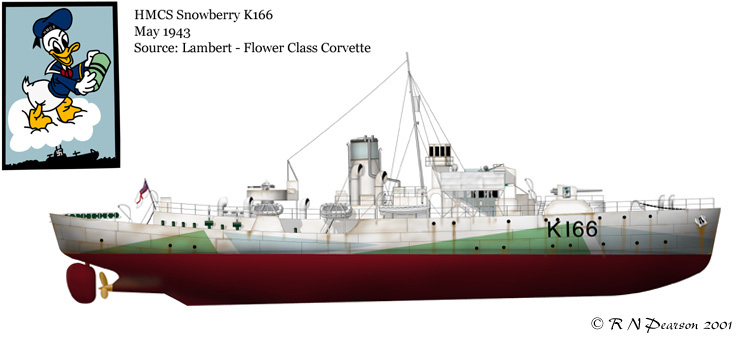
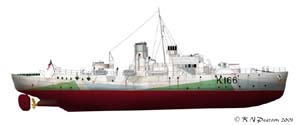
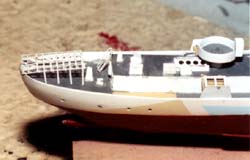
 Since
completing the model I have begun work on all my Flower class illustrations
and in my research I found the emblem worn by Snowberry on her gunshield.
I shall add this to the nameplate in the future when I next need to print
some for the other Flowers I am working on. As mentioned I plan to more
of these - here is a preview of my short fo'c'sle conversion to an as
yet unnamed RCN Flower. Since
completing the model I have begun work on all my Flower class illustrations
and in my research I found the emblem worn by Snowberry on her gunshield.
I shall add this to the nameplate in the future when I next need to print
some for the other Flowers I am working on. As mentioned I plan to more
of these - here is a preview of my short fo'c'sle conversion to an as
yet unnamed RCN Flower.
I am pleased with the level of detail the kit provides. The instructions,
while appearing comprehensive are in French and require a good deal of
study of the diagrams to understand what is intended. The only real deviation
from the kit parts I can recommend is to get some Tom's
Modelworks two-bar rails. Do I like the kit? I have over a 1/2 dozen
of them. .. you tell me.
|