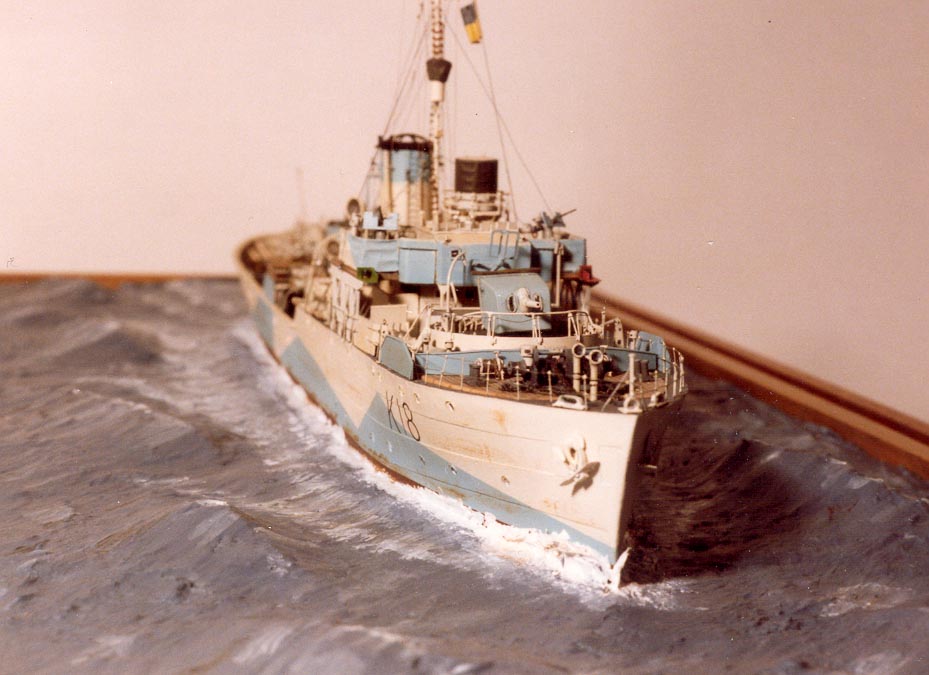
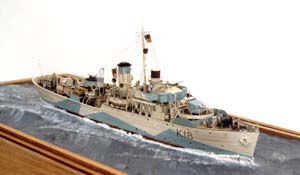
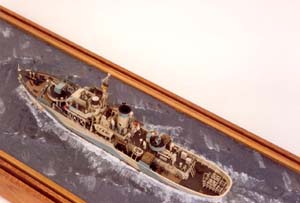
Scratchbuilt 1/192
HMS Campanula
|
 |
I remember the first time I saw the movie, The Cruel Sea. It was in
the 1950s and ran as a double feature with the hit Alfred Hitchcock movie,
Rear Window, at the neighborhood theater. Rear Window was great, but,
The Cruel Sea made an enduring impression on me to this day. It's my favorite
sea story and I named my last sailboat, a 27 foot sloop, Compass Rose.
Except for college and military service in the USN I have been building
models since I was a youngster in the 50s. All kids built models in those
days. Sadly that's not true today since model building does not provide
instant gratification.
For years I collected photos and plans of Flower Class Corvettes. Fifteen
years ago I felt I had enough research material and ship modeling skills
to build a model of this tough little ship. The enclosed photos are the
result of that effort.
 I
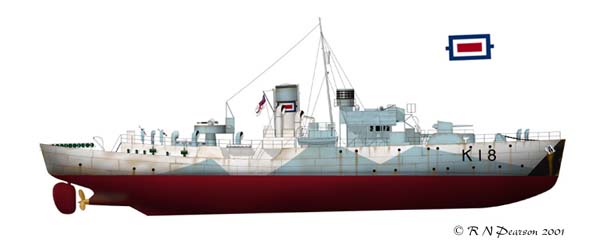
wanted to build a waterline model of a long foc'sle corvette with mast
aft of the bridge and painted in a Western Approaches Camouflage scheme.
The setting was to be a corvette working through a moderate sea state
in mid-1942. All the photos I've seen of corvettes show the decks loaded
with gear so I decided to put as many fittings on it as I possibly could. I
wanted to build a waterline model of a long foc'sle corvette with mast
aft of the bridge and painted in a Western Approaches Camouflage scheme.
The setting was to be a corvette working through a moderate sea state
in mid-1942. All the photos I've seen of corvettes show the decks loaded
with gear so I decided to put as many fittings on it as I possibly could.
I named the ship HMS Campanula, K 18. In all honesty I had no photos
of this corvette but gave it this name in honor of Nicholas Monsarrat,
author of The Cruel Sea. I read in a biographical note that he served
on this ship.
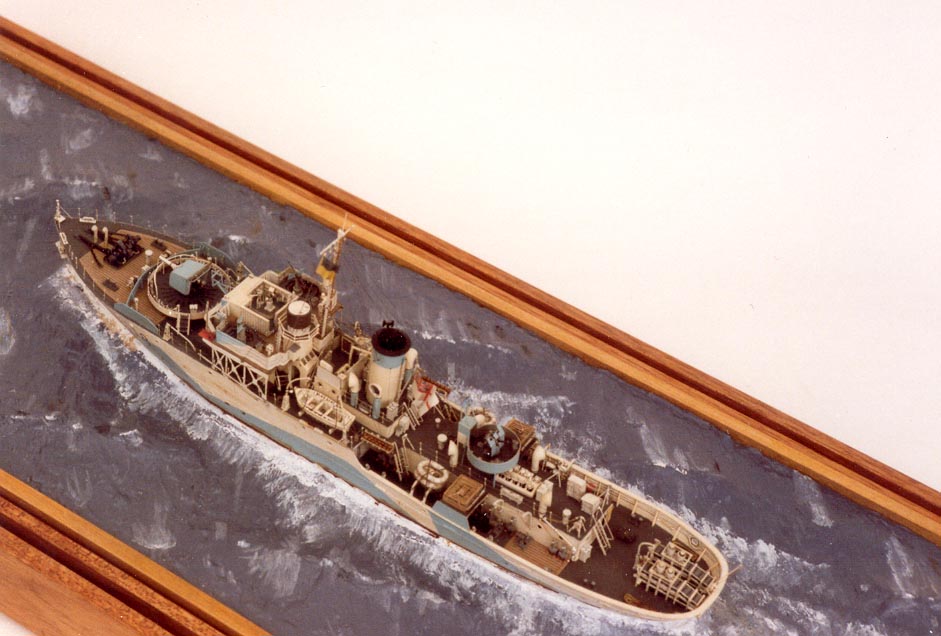
 The
scale selected was 1/16" = 1 ft or 1/192. At that scale the model could
easily be displayed on a mantle or bookcase. Except for purchasing the
anchor chain and some ventilators, the entire model is scratchbuilt with
an airbrushed finish. Working a few hours a night, the model took eighteen
months to complete. I spent four months building the basic hull. Fabricating
the superstructures and fittings took another thirteen months. Final assemble,
sculpting the sea and building a display case took a month. The
scale selected was 1/16" = 1 ft or 1/192. At that scale the model could
easily be displayed on a mantle or bookcase. Except for purchasing the
anchor chain and some ventilators, the entire model is scratchbuilt with
an airbrushed finish. Working a few hours a night, the model took eighteen
months to complete. I spent four months building the basic hull. Fabricating
the superstructures and fittings took another thirteen months. Final assemble,
sculpting the sea and building a display case took a month.
The waterline hull was rough carved in two halves, port and starboard,
out of basswood and glued together. The assembled hull was smoothed and
faired with sandpaper. I added shell plating and decks made of smooth
Strathmore card; also called Bristol board. It comes in thicknesses of
.005, .010 and .015 inches. The best tools to work this material, aside
from a good old X-ACTO knife, are single edge razor blades and, for fine
cutting, a surgeonís scalpel. A surgeon's scalpel is much easier to obtain
than you may think. I purchased mine at a hobby shop. Another important
tool is a steel straight edge with masking tape or fine sandpaper glued
to the bottom to prevent slipping when slicing long strip of stock.
After adding a few details to the hull I airbrushed it with gray lacquer
auto body primer and then top coated it with hobby paints in the Western
Approaches camouflage scheme.
The hull, without any superstructure lay dormant for the next thirteen
months while I made - as subassemblies - the superstructures and countless
fittings. This stage of ship model building can become very boring and
it's important to stay focused and not stray onto or start another project.
You just have to tough it out, stick with it and view every fitting as
a separate model.
 It
would take too much space to go into the details of fabricating the fittings.
All I can say is that they were made out of Strathmore card, plastic strips,
copper and brass wire. The glues I used were thick and thin CYANOACRYLATE
and epoxies, also purchased at the local hobby shop. The flags and canvas
around the open bridge were made of aluminum kitchen foil. It
would take too much space to go into the details of fabricating the fittings.
All I can say is that they were made out of Strathmore card, plastic strips,
copper and brass wire. The glues I used were thick and thin CYANOACRYLATE
and epoxies, also purchased at the local hobby shop. The flags and canvas
around the open bridge were made of aluminum kitchen foil.
With regard to making fittings; I follow the advice handed down to
me by older and more experienced model builders. Depending on your skill
level, if you can't build it to scale, leave it off.
The most rewarding time came after seventeen months of plodding along
when I got to fasten all the superstructure subassemblies and fittings
onto the bare hull and in two short weeks the model was finished.
The sea base was sculpted from a mixture of Liquitex brand modeling
paste and gel. This medium cures slowly and allows plenty of time for
sculpting and correcting errors. The sculpted sea base is about º to 3/8th
inches thick.
I don't consider a model finished until it's protected by a glass or
Plexiglas case. That's the last thing I made.
|