Accurizing the Matchbox/Revell 1/72 Flower Class Corvette Pt.7
Funnel & Vents
|
 |
One of the things that struck me as needing more detail was the kit
funnel and vents. The funnel is a very basic representation of the real
thing and can stand to have some easy additions made to improve its
appearance. One thing that is noticably lacking are rivets to the funnel.
There should be six vertical and four horizontal rows of rivets. Great
Little Ships offers a brass overlay that has this detail in place,
and for those so inclined I can't recommend their products enough ..
however I am trying to scratchbuild as much of this model as possible
and I decided to try my hand at making my own overlay.
 A
friend of mine sent me a tracing of his GLS funnel overlay and I then
traced this onto a new sheet and saved the original for future models.
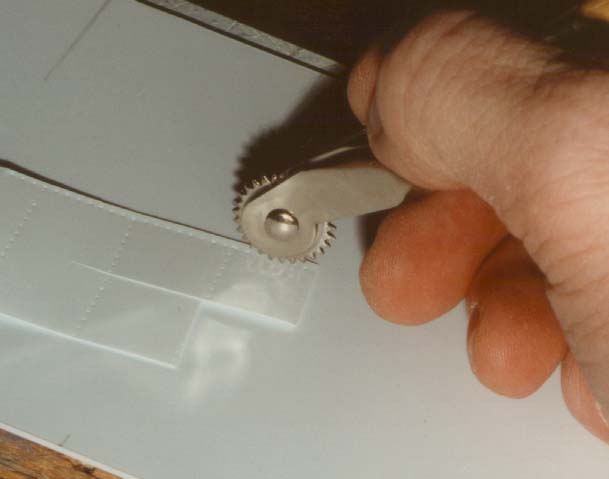
The tracing was taped to a piece of .005" evergreen styrene and
using one of those wheel tracing thingies from the sewing shop, I ran
it along a steel ruler to emboss the rivet pattern on the reverse side.
Be sure to place the styrene on top of a surface with some give so as
to allow the rivets to form. This should not be so soft that the styrene
distorts however. A
friend of mine sent me a tracing of his GLS funnel overlay and I then
traced this onto a new sheet and saved the original for future models.
The tracing was taped to a piece of .005" evergreen styrene and
using one of those wheel tracing thingies from the sewing shop, I ran
it along a steel ruler to emboss the rivet pattern on the reverse side.
Be sure to place the styrene on top of a surface with some give so as
to allow the rivets to form. This should not be so soft that the styrene
distorts however.
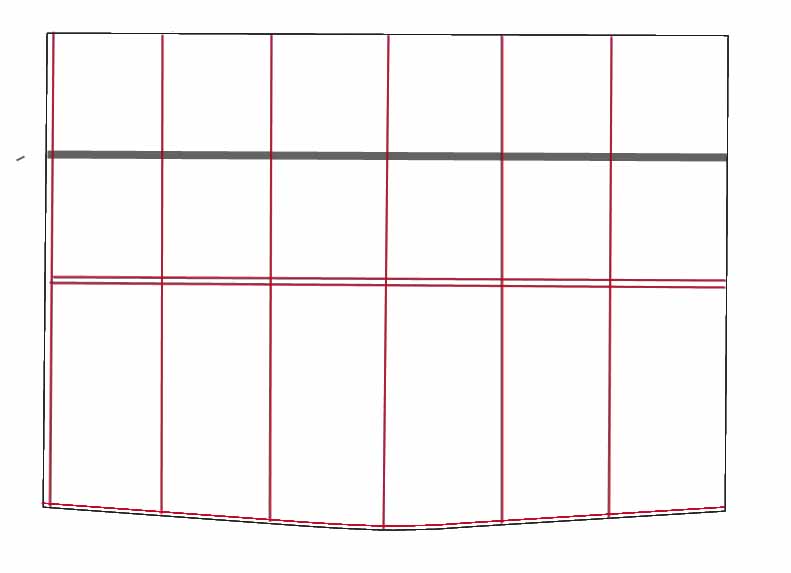
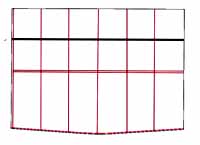 Note
that the horizontal rivets are arranged in three groupings. .. the one
on top is actually on a separate piece of styrene and is done later.
The next set down has a double band close together, while at the very
bottom is the final row. On the drawing, the rivet lines are shown in
red, while the reinforcing band with the additional strip is shown as
a wider black line. For those making use of this template, the full
size image should be set to print at 150dpi, otherwise you shall have
a 1/32 scale funnel!! Note
that the horizontal rivets are arranged in three groupings. .. the one
on top is actually on a separate piece of styrene and is done later.
The next set down has a double band close together, while at the very
bottom is the final row. On the drawing, the rivet lines are shown in
red, while the reinforcing band with the additional strip is shown as
a wider black line. For those making use of this template, the full
size image should be set to print at 150dpi, otherwise you shall have
a 1/32 scale funnel!!
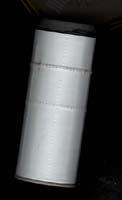 The
raised band on the kit funnel should be removed. I used a sanding drum
on my Dremel and followed that up with some light hand sanding. Cut
the overlay slightly oversize on one edge and along the top, and check
for fit to the funnel. .. trim the side to ensure a snug fit. I then
coated the funnel with Testors Liquid cement and wrapped the overlay
around the funnel, making sure that the join is held together. When
dry, trim the excess from the top. The
raised band on the kit funnel should be removed. I used a sanding drum
on my Dremel and followed that up with some light hand sanding. Cut
the overlay slightly oversize on one edge and along the top, and check
for fit to the funnel. .. trim the side to ensure a snug fit. I then
coated the funnel with Testors Liquid cement and wrapped the overlay
around the funnel, making sure that the join is held together. When
dry, trim the excess from the top.
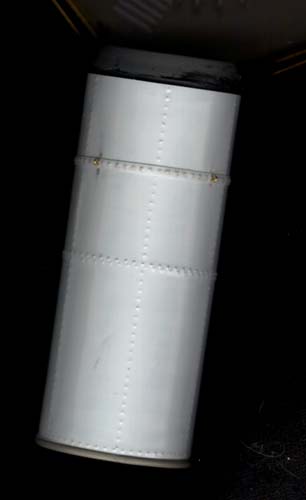
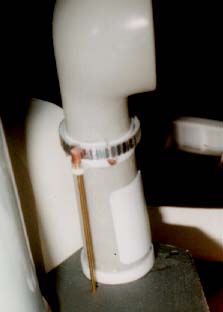
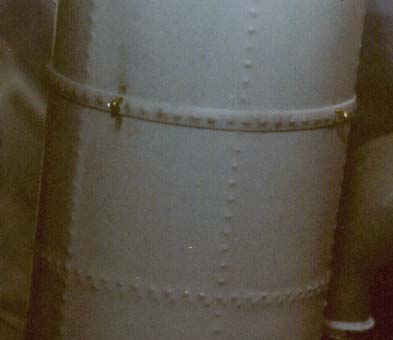
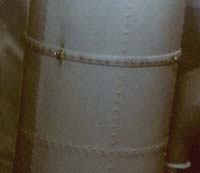 The
reinforcing band around the top is now added. this was a strip of .080
x .020 that was also embossed with a rivet pattern. Once this was in
place the attachment points for the rigging was begun. I used .017 brass
rod to make the loops and also to make the holes in which they fit to
the funnel. A section of the wire was placed in my pinvise and used
to drill a hole along the reinforcing band. The brass loop was then
placed into the hole and the location of the second hole was marked
above the first .. this was drilled and the rung was then CAed in place.
There are four of these arranged in an X pattern when viewed from above. The
reinforcing band around the top is now added. this was a strip of .080
x .020 that was also embossed with a rivet pattern. Once this was in
place the attachment points for the rigging was begun. I used .017 brass
rod to make the loops and also to make the holes in which they fit to
the funnel. A section of the wire was placed in my pinvise and used
to drill a hole along the reinforcing band. The brass loop was then
placed into the hole and the location of the second hole was marked
above the first .. this was drilled and the rung was then CAed in place.
There are four of these arranged in an X pattern when viewed from above.
 The
screen atop the funnel should also be replaced with a better one, however
for now I have just raised its height to allow a gap between it and
the funnel by gluing a ring of styrene about 2mm below the inside lip
of the funnel - the cap sits on this lip and is thus raised from the
funnel. The
screen atop the funnel should also be replaced with a better one, however
for now I have just raised its height to allow a gap between it and
the funnel by gluing a ring of styrene about 2mm below the inside lip
of the funnel - the cap sits on this lip and is thus raised from the
funnel.
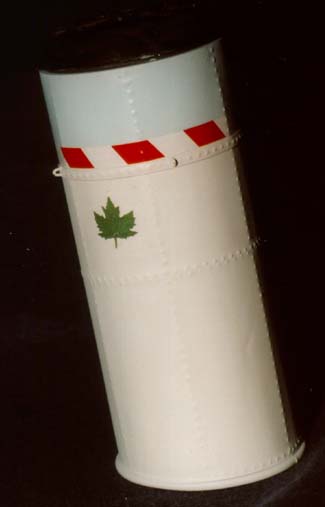
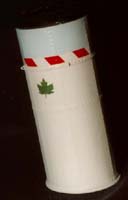
The funnel was later sprayed with a grey primer and a month or two
later with WEM's Colourcoat RN White, followed by Colourcoat WA Blue.
The next step was to add the red/white barberpole marking of Escort
Group C-3. This was done on my Alps printer and went on quite nicely.
The final step was to add the green RCN Maple Leaf – also a product
of the Alps.
VENTS
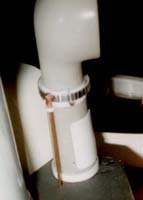
 As
mentioned in the basic
accurizing article, the vents can be improved by thinning down the
section of the mouth on them. However something still seemed wrong.
A look at various photos showed that the real vents were designed to
be able to be turned into (or out of) prevailing winds and other assorted
weather. In order to accomplish this, the four tall vents beside the
funnel have an arrangement of rollers and shafts that allow the top
portion to be turned from below. As
mentioned in the basic
accurizing article, the vents can be improved by thinning down the
section of the mouth on them. However something still seemed wrong.
A look at various photos showed that the real vents were designed to
be able to be turned into (or out of) prevailing winds and other assorted
weather. In order to accomplish this, the four tall vents beside the
funnel have an arrangement of rollers and shafts that allow the top
portion to be turned from below.
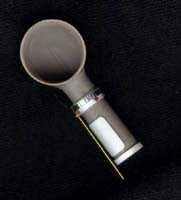
 I
began by removing the raised bands on the vents and replacing them with
strip styrene. There is a .015 x .060 strip along the bottom, and a
.010 x .120 for the wider band at the top. This then has a .015 x.060
strip added for the gearing. The gear itself is embossed aluminum foil.
The rollers are the Slaters rod included with the kit, while the rotating
gear is .017 brass rod with the Slaters rod on the end. This fits into
a hole on the funnel deck. The final touch is the removable panel on
each of the four large vents. I
began by removing the raised bands on the vents and replacing them with
strip styrene. There is a .015 x .060 strip along the bottom, and a
.010 x .120 for the wider band at the top. This then has a .015 x.060
strip added for the gearing. The gear itself is embossed aluminum foil.
The rollers are the Slaters rod included with the kit, while the rotating
gear is .017 brass rod with the Slaters rod on the end. This fits into
a hole on the funnel deck. The final touch is the removable panel on
each of the four large vents.
If I was to do these again, I would use thinner styrene, as they still
appear to be slighty overscale .. but they are far better than the kit
parts.
I would like to thank David Parkins of GLS
for allowing me to make use of the tracing of his funnel overlay in
this article.
|